I’m into fully styled photoshoots… as in I’m completely addicted to them. So when cake smashes started trending, I couldn’t be more thrilled.
I’ll be the first to admit. When I planned my sons first cake smash… it wasn’t ideal. Definitely not my best work. At the time I was 37 weeks and 2 days pregnant with my second, and scheduled to have a c-section the next day. (Yes you read that right, 1st birthday cake smash with my son, and 37 weeks pregnant….yikes)

Meh. Not great.
Not Terrible.
But not great.
This year I’m making up for it! So how do you go about planning an EPIC cake smash session??
First… Pick a theme.
For my kids, after a long drawn out process, we decided we were going to do Jurassic World for my 2 year old son and Cinderella for my daughter. I try not to go with the typical, and if I do go with something more “traditional” I find ways that I can make it unique.
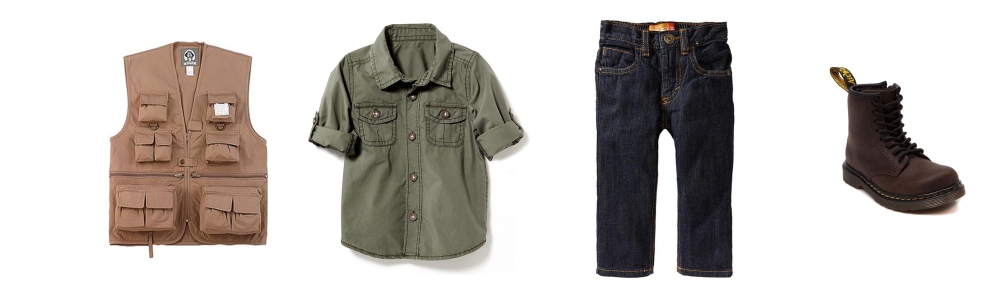
Second… Find the outfit.
I know a lot of people would put this part of the process last, but I actually find it much easier to plan a cohesive set and theme if you do it based on what the child is wearing. What you wear is CRUCIAL to how the final images come out, photoshop just can’t fix certain things. So to me, this rule stays the same when it comes to the little ones too.
When basing a session off of a character, I personally like creating/finding pieces that look as authentic to the chosen theme as possible and often that means looking for clothing in less conventional places.
This is the outfit we plan on having my son wear for his Jurassic World themed session, it definately is pretty true to the style of Chris Pratts role in the film!
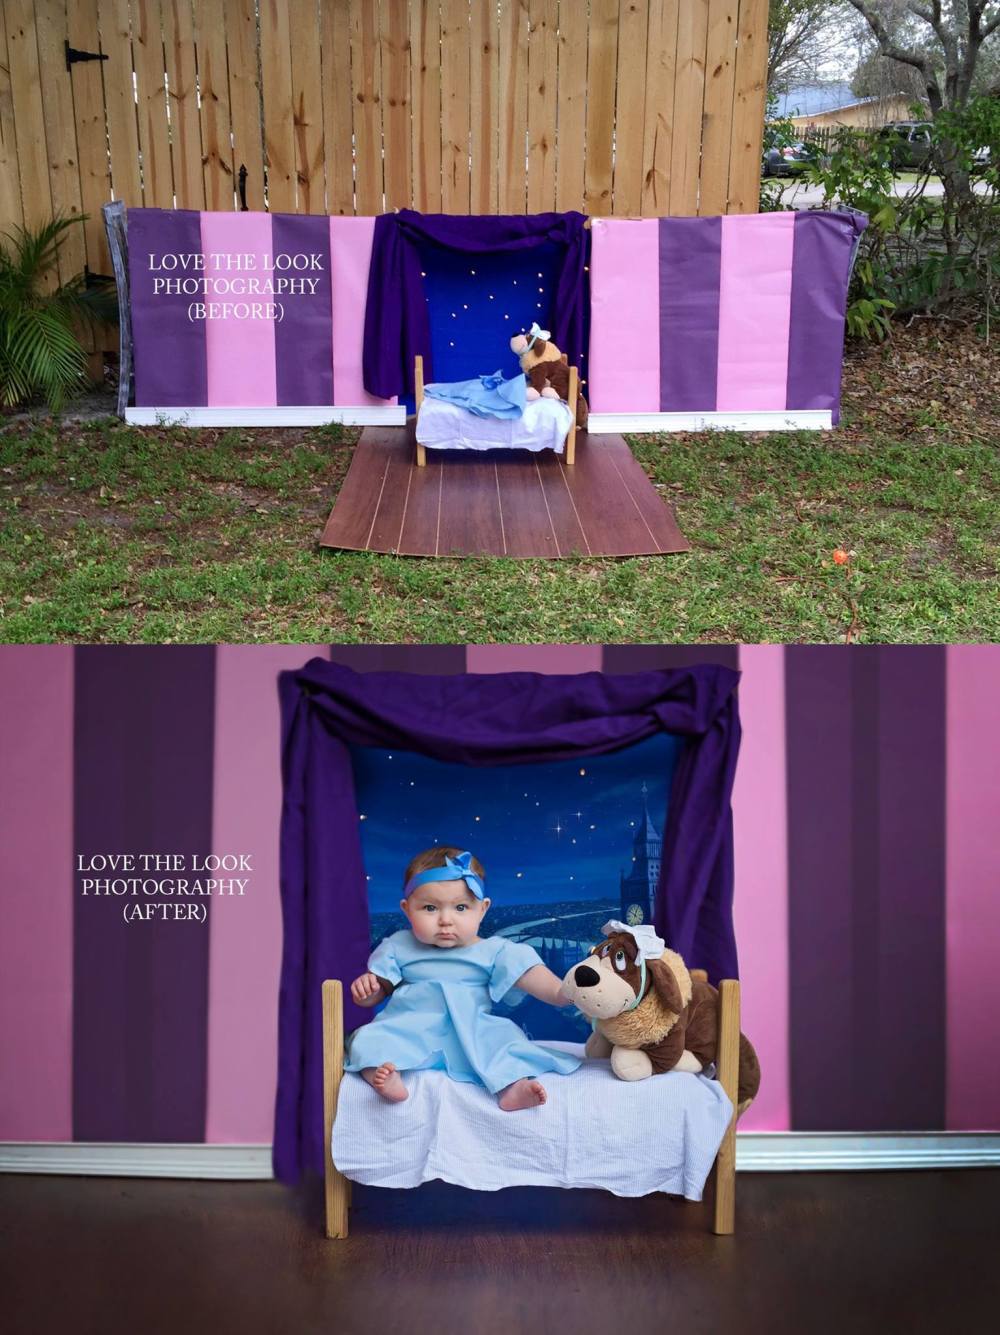
Third… Create the set.
Take the time to actually watch the movies, read an excerpt from the book, or find images that are directly from whatever theme you’ve chosen. Find a part of the story that is simple/but iconic to the character and overall theme.
For the past 6 years I worked 100% outdoors. I tried to use what was naturally around me as much as possible (including light) and have leaned more towards keeping props to a minimum. I’m VERY intentional with what I choose to be in an image, and try to keep my costs as low as possible (without sacrificing quality).
Fourth… Choose your cake wisely!
I cannot stress this enough… the cake you use matters! I didn’t realize this in my early years of photography and goooood gracious did I learn the hard way.
I know it’s tempting to want to go the easy route and just pick up a small ready made cake from your local grocery market, but the cake really is the center piece that pulls together the whole session. It may be just for the baby to try, but it’s going to be the focal point in most of the images along with your little one. If you aren’t a skilled baker, I highly recommend having someone create it for you!
****Some things that are REALLY important to note****
Chocolate is yummy…. but lets be real. As a mama when I see brown goop smudged all over my baby, it immediately reminds me of poop. It just does. Ew… don’t do it folks.
Red is a no no… although red is vibrant and pretty , when its painted all over your teeth and mouth it looks like your bleeding. Definitely not the look you want to go for with your precious little ones unless your into the whole vampire effect.
Most other colors are pretty “safe” to use without resembling something unpleasant.
Those are the very basic principles that help build a successful cake smash session in my experience. Don’t be afraid to go out of the box and away from the trendy, you just might surprise yourself with the amazing things you can create!


